Project Wrap Up
Once your project is fused, you can slump it any way you would like! When slumping iridized projects, keep in mind these two important facts from the beginning of this tutorial: »
Stack the glass so that the blasted surfaces are placed against each other: »
Make sure that all glue is dry and that all tape is securely burnished to the glass. If your sandblaster allows you to adjust pressure, turn it down to about 25 PSI. »
Designing your project is a critical step for irid-on-irid fusing. Here are two important guidelines: »
Now you can put your understanding of iridized glass to use in a fused glass project. To complete this project, you’ll need the following: »
While iridized surfaces won’t stick to each other, they will stick to non-iridized glass. »
There are three things you should know about working with iridized glass: »
Iridized glass is “normal” glass that has a thin, metallic coating on one surface. The most common iridized coating colors for fusible glass are gold, silver, and rainbow. »
Layering iridized glass can be tricky because iridized surfaces will not fuse to each other. With a little clever sandblasting, though, you can create some spectacular designs! For this tutorial, you'll need iridized glass, some masking materials, and a sandblaster. »
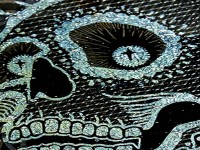
For this two tutorial I’ll show you the making of two puddles. »
This may be one of the easiest tutorials we've ever provided - but don't let that fool you. Our fused glass "puddles" will get your mind racing with endless possibilities. For this tutorial, you'll need only the basics - some glass, a kiln, and not much else! »