Fused Glass “Puddles”
What’s a “puddle”?
Component making is a big part of working with fused glass. Pot melts, pattern bars, and powder wafers are just a few of the things we make that become parts of bigger projects This tutorial shows you one of the easiest to make and most useful components, something we call “puddles”.*
The technique takes advantage of two of the most important glass properties:
1) Surface Tension:
When glass melts it seeks a height of 6 mm (1/4 inch). You can thank surface tension for that. (http://en.wikipedia.org/wiki/Surface_tension)
2) Gradual Melting
As glass is heated, it metls – and softens – gradually. This allows glass to fuse together without colors mixing completely (the way ice cubes made from colored water would mix if allowed to melt together in a drinking glass).

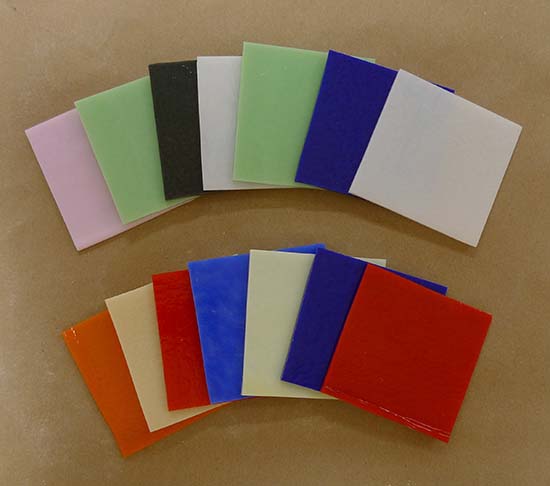
All you need for this tutorial are some small pieces of sheet glass, your kiln, and some glass breaking tools. A hammer and mosaic nippers are also useful.
Let’s get started!
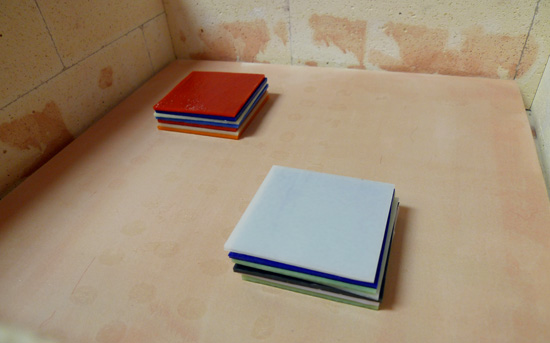
Stack ‘Em!
For this two tutorial I’ll show you the making of two puddles. Each one includes seven 1/8″ thick layers of 3 X 3 inch glass.
| Segment | Ramp | Target | Hold |
| 1 | 500° F / hr | 1225° F | 1 hour |
| 2 | FULL | 1500° F | 30 minutes |
| 3 | FULL | 950° F | 1 hour |
| 4 | 150° F / hr | 725° F | none |
As with all firing schedules, you may have to adjust this one for your kiln and/or project. If you are firing layers that are much bigger than 3 X 3 inches you may need to slow the ramp in the first segment to avoid thermal shock (especially if your kiln has side elements).
If you happen to peek when the kiln is at full-fusing temperature, you should see something like this:
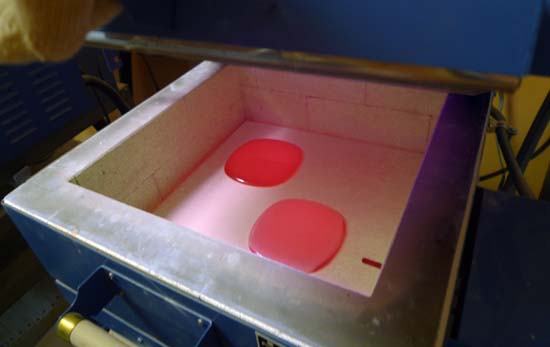
Your seven layers of glass should spreading to about one third of the orginal height.
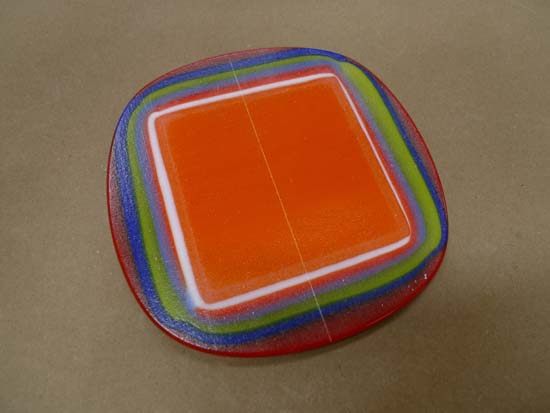
Here’s what the glass looks like when the firing is complete:
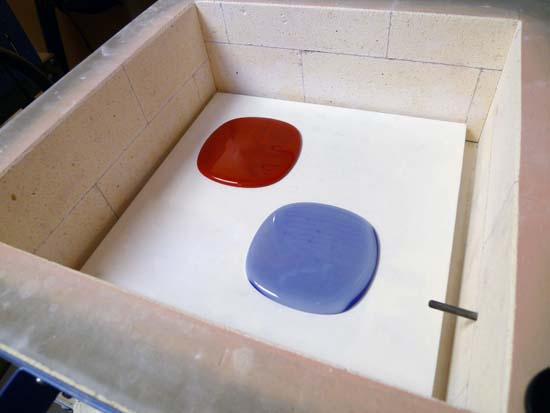
Take your fully cooled puddles to your work table for the next step…
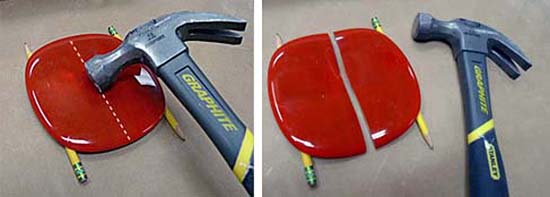
Crack ‘Em
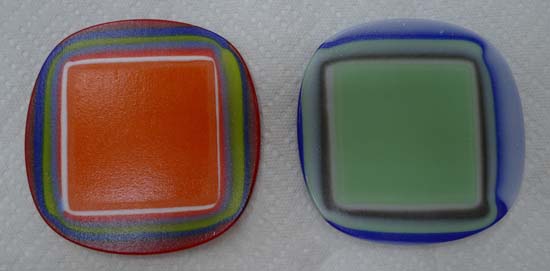
Clean your puddles and turn them over. You should see concentric rings of colors:
Using firm pressure, score your puddle in the middle with a glass cutter:
If you are able, break the glass using running pliers.
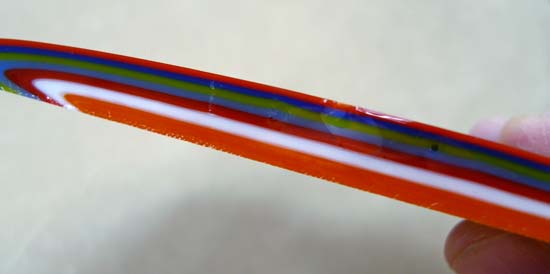
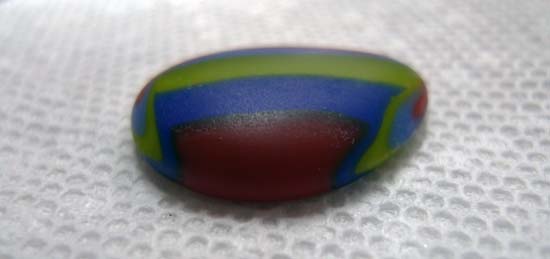
Take a good look at the edge revealed by the break. You’ll see the same colors you stacked in the kiln – only each layer is now much thinner. Here’s one of my samples:
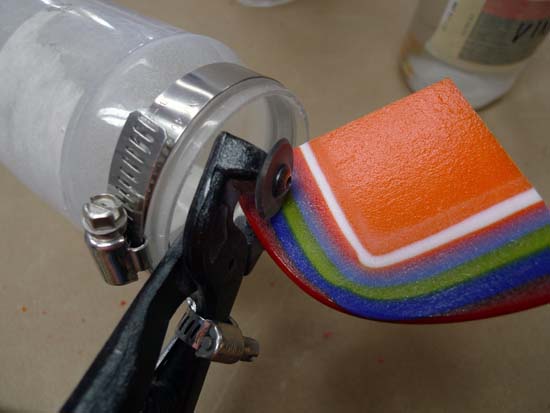
Using your tools of you choice, continue to break the puddle into small pieces. I prefer a pair of mosaic nippers (with our easy-to-make Mosaic Catch-O-Matic).
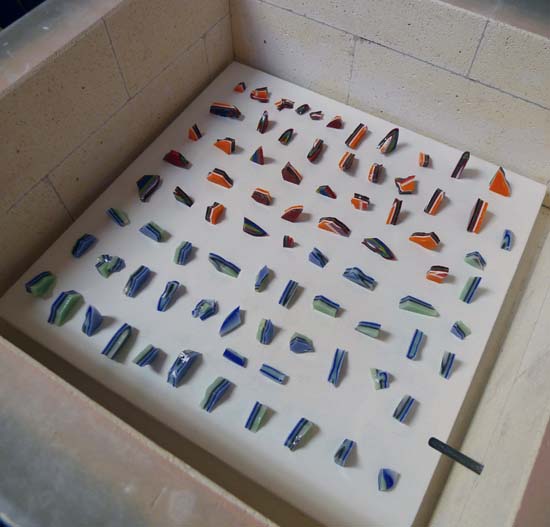
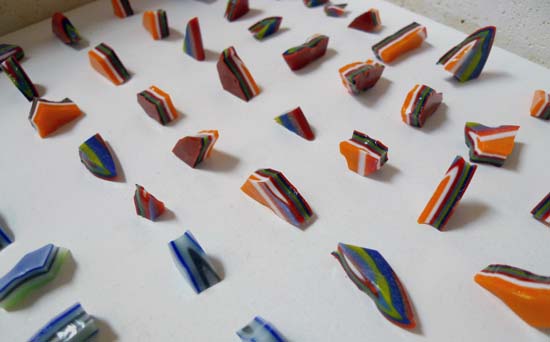
Continue until you have a variety of pieces, as shown in the photo below:

Cabochons!
Small chunks of glass, when fired to a full fuse, melt and round out in the much the same way a small, melting chunk of ice turns into a round drop of water. To create our cabochons (round, unfaceted “stones”), simply arrange chunks of your puddle on a kiln-washed shelf.
Keep these things in mind:
- Don’t use shelf paper or fiber paper since both will interfere with the flow of glass and the rounding of your cabochons.
- Take a picture of your pieces before and after firing. This will teach you how to get different styles of stripes by changing how the chunks are placed on the shelf.
- Stacking small puddle pieces on larger ones before firing can provide interesting results.
Before firing, your kiln shelf should look something like this:
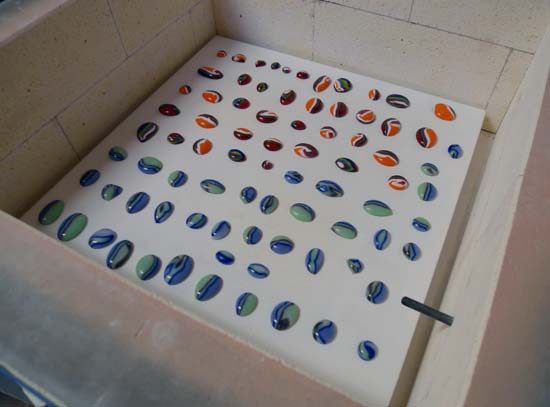
And here is a close up:
Fire using this schedule:
| Segment | Ramp | Target | Hold |
| 1 | 500° F / hr | 1000° F | none |
| 2 | FULL | 1500° F | 30 minutes |
| 3 | FULL | 950° F | 30 minutes |
| 4 | 300° F / hr | 725° F | none |
Clean ‘Em Up!
There’s a good chance that your puddle cabochons will have some shelf primer stuck to their bottoms and possibly devitrification on their tops. Both are easily fixed.
To remove the shelf primer, simply soak the pieces in vinegar. After 20 -30 minutes, shake the container gently and remove the cabochons. Any remaining shelf primer should now rinse away easily. If there is still shelf primer stuck to your glass repeat the process with a longer soak.
The most effective way to remove any devitrification is with a sandblaster. Pressing the several cabochons onto a piece of duck tape will make blasting multiple pieces much easier by allowing you to blast a “strip” of cabochons at once.
If you do not have access to a sandblaster, you can remove light devitrification with glass etching cream. “Armor Etch” is one brand that is widely available in the United States.
Paint the cabochons with a coating of cream and wait 30 minutes. For heavier devitrification, a longer wait or additional treatments may be required.

When etching is complete, rinse and clean the cabochons. The surface will no longer be glossy, but the “scummy” devitrification should be gone.
Return the sandblasted (or acid etched) cabochons to the kiln for a final fire polish. Use only shelf primer on the kiln shelf – shelf paper (like Bullseye’s “Thin Fire”) can cause slight hazing when fire polishing glass.
Here’s the firing schedule:
| Segment | Ramp | Target | Hold |
| 1 | 500° F / hr | 1000° F | none |
| 2 | FULL | 1400° F | none |
| 3 | FULL | 950° F | 30 minutes |
| 4 | 300° F / hr | 725° F | none |
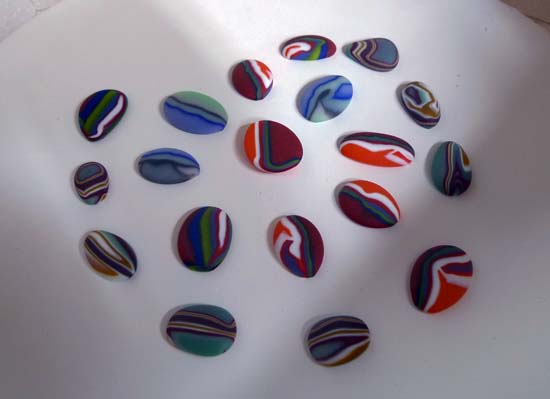
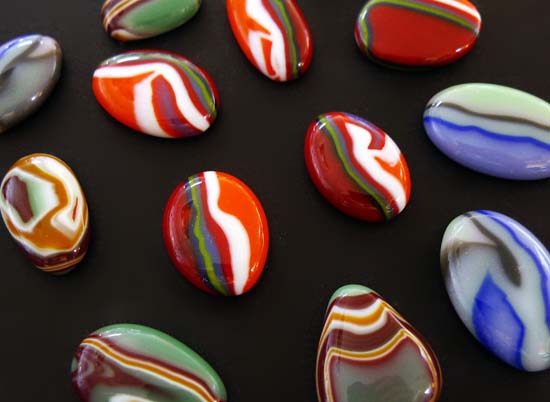
Once the firing is complete and the kiln has cooled, remove your finished cabochons!
Now on to the wrap up…
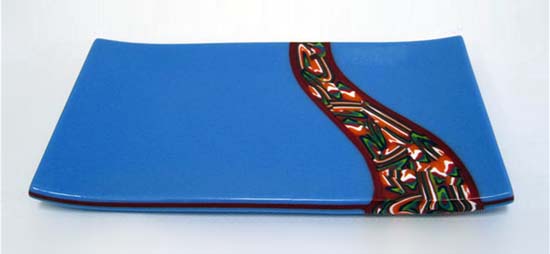
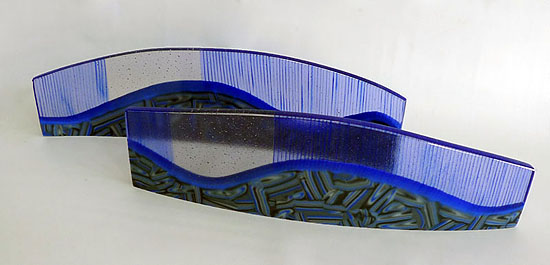
Endless Possibilities
This technique is a great way to make jewelry components – but don’t stop there!
Fusing puddle pieces together is a great way to create interesting designs and patterns for larger works of glass art.
Here are just a couple examples: