Fossil Vitra
Kilnformed glass artists are always looking for new ways to put imagery on glass. Well documented options include painting with enamels (if you have the skill), silk-screening (if you have the equipment), and even “assembling” the picture with frit (if you have the patience).
This tutorial, which first appeared in the Winter 2010 Glass Craftsman magazine, is for a technique I’ve named Fossil Vitra – an alternative to the above methods. Fossil Vitra requires no painting or drawing skills, and no special equipment.
What You’ll Need
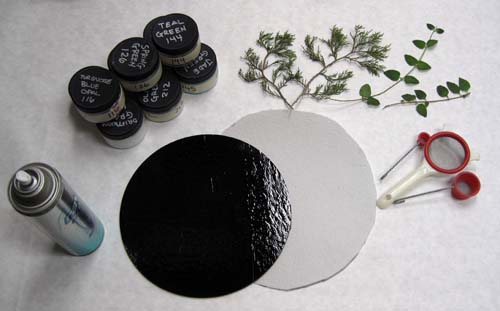
The materials required for Fossil Vitra will be readily available in most kilnformed glass studios. A broad palette of colored powders is extremely useful here so we’ll be using Bullseye compatible glass. You will need:
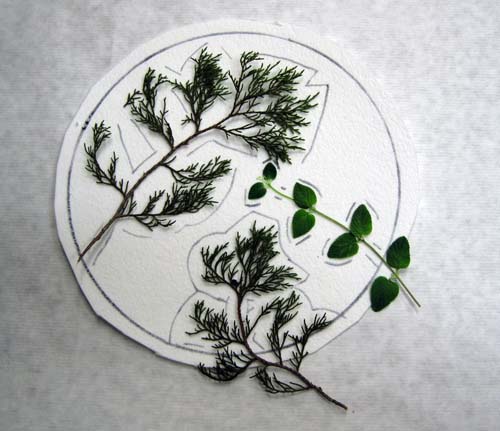
• Plant leaves. Leaves that lay flat are ideal. Fern leaves provide great results. Plant leaves on branches that are no more than 1/8th inch thick also work very well.
• Sheet glass. For this tutorial we will be working with an 8 inch circle of black glass and making a simple bowl.
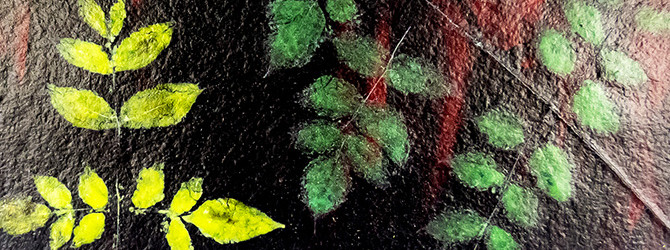
• Glass powders. A combination of opaque and transparent powders will be used to allow for depth. We are going to stay true to the natural palette for leaves and use mostly greens and browns.
• Fiber paper (1/8th inch thick). This needs to be slightly larger than the piece of sheet glass.
• Hairspray – the cheaper the better. White Rain and Aqua Net both work great. Do yourself a favor and stick to the unscented.
• Powder sifter(s). It is good to have a couple different sizes.
Any time you use glass powders you will want to protect your lungs. An appropriate respirator and HEPA vacuum are critical. Remember that the finest glass particulates can hang in the air for hours. Do not assume you can take off your respirator the moment you put your powders away.
In the next step, we will prepare the fiber and leaves.
Leaf and Fiber Preparation
To get ready to create your piece, do the following:
• If your leaves and/or branches don’t lay flat you should place them under a heavy book to flatten them. You may even want to gently break some of the branches to help flatten the plant. If there are a lot of overlapping leaves consider pruning some to simplify the design.
• Trace your base glass onto your fiber paper.
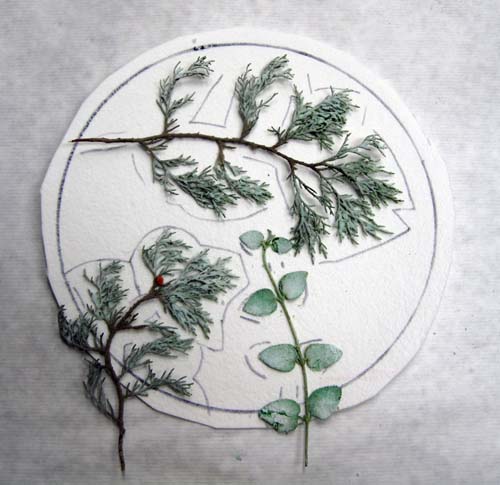
• Place your (now flat) plants onto the fiber paper and make positioning (registration) marks on the fiber paper showing where the leaves will be placed.
You can use either side of the fiber paper (most fiber paper has both a smooth and a rough side). If you choose to keep the rough side of the fiber paper up, your glass will have a more heavily textured surface on the side that was facing the fiber paper as the glass will take on the texture of the fiber paper it is fired on.
As you’ll see later, this step is important because you’ll want to place your powdered leaves on the fiber paper with as little handling and repositioning as possible. Don’t worry if the plant extends past the boundary for the bowl design.
At this point your fiber paper should look like this:
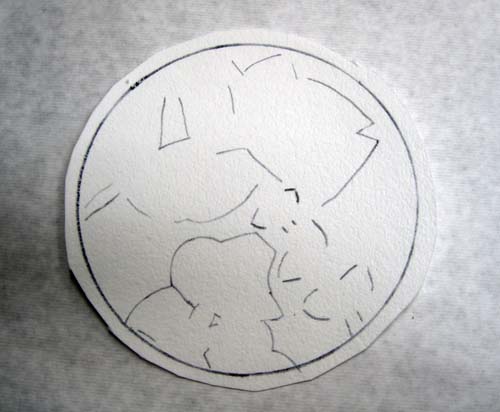
You can now set the fiber paper aside. You will be placing your powder-coated leaves directly onto this fiber paper. If your kiln is close to your work table you may want to set the fiber paper on the kiln shelf. Otherwise, consider putting the fiber paper on a stiff piece of cardboard or piece of glass to make it easy to move once you’re done assembling your Fossil Vitra components.
The next thing we need to do is “coat” the leaves with powder.
Powder-Coating the Leaves
Place one of your leaves (or branches) onto a sheet of paper towel, newsprint, or other paper. The plant should lay relatively flat. Spray it with a moderate coating of hairspray. The leaves should look wet – but not be dripping.
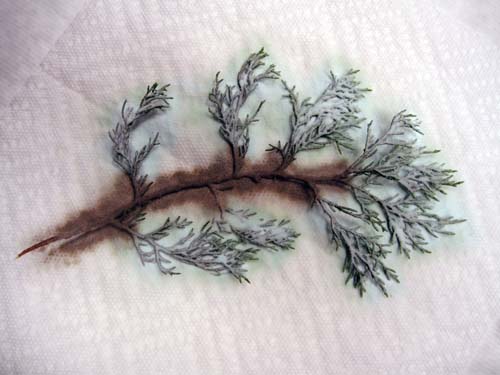
To make the branches stand out use a small sifter to place some color – in this case Sienna and Woodland Brown – on the woody parts of the plant.
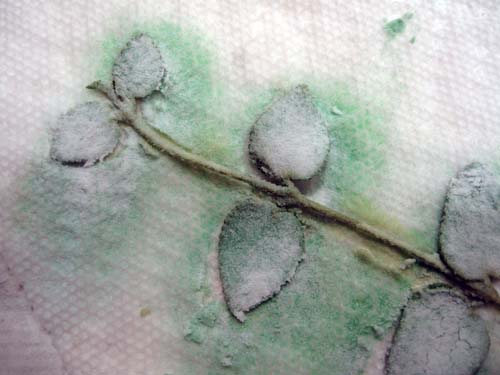
Now, using a larger sifter, add powder to the still wet leaves and branches. For the most realistic results, sift different shades of green onto different areas. Once you’ve covered the leaves, spray another coating of hairspray. Repeat several times, layering the powders.
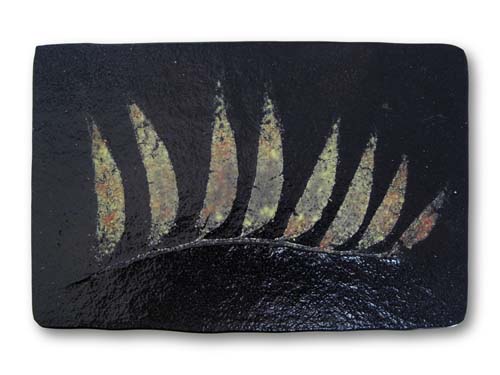
It is helpful to visualize how the powders you place on the leaves will be layered on the final piece. Take another look at the illustration at the start of this article. You’ll see the glass is fired design-side-down. This means that the first powder placed on our leaves will be the top-most powder on the finished piece. The last powder placed on the leave will be the glass that fuses to the base glass.
With this in mind, I will often place transparent powders on the leaves first and then back them with opaque colors. With practice you’ll learn to layer your powders to create a wonderful depth in the colors of the final piece. If this is hard to visualize don’t worry. It will make more sense after you complete your first piece.
Once the branch and leaves are covered with powders add a final coating of hairspray and let it dry. Lift the plant using the paper underneath it and set to the side.
Repeat the above steps for all the leaves and branches you will be using in this project.
Now we are ready to assemble everything for firing.
Assemble for Firing
You now have your fiber paper (marked for leaf placement) and your powder-coated leaves. All that is left to do is assemble the pieces and fire the project.
Using the registration marks you created at the start, carefully place the powder-coated leaves on the fiber paper. A small spatula or palette knife will help you lift the leaves without disturbing the fragile powder. Lifting the leaf from multiple positions will help to keep it from bending under the weight of the powder. For best results, avoid having to reposition the leaves once you have set them on the fiber paper. The more the pieces are handled the greater the chance that powder will come loose and fall off the leaves.
Once all the leaves are positioned, move the fiber paper and leaves to the kiln shelf (if it isn’t there already). Here’s what it looks like:
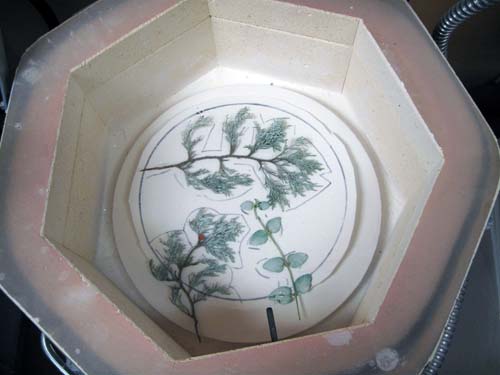
Clean the base glass and place it carefully and straight down on the powder-coated leaves. This will cause a lot of the powder to come loose from the leaves so you do not want to lift the glass to reposition. Your piece is ready to fire:
Okay, we are ready to fire our project.
Firing Your Fossil Vitra
Here’s the kiln schedule for firing your piece:
| (°F per Hour) | TARGET
(°F) |
HOLD (Minutes) |
NOTES |
| 300 | 900 | 60 | Our major concern here is avoiding thermal shock. The one hour hold is to ensure the plant material, fiber paper binder and hairspray burn off completely before the glass softens. Venting the kiln during this segment is recommended. |
| 100 | 1225 | 30 | A bubble squeeze at 1225 minimizes the chances of any trapped air causing bubbles. |
| FULL | 1425 | 5 | We are looking for a sufficient fuse to fully melt the powder sandwiched between the glass and fiber paper – but not so hot that our single layer of glass starts to pull up and thicken around the edge. |
| FULL | 900 | 30 | This is our anneal hold (using Bullseye’s new recommended 900°F). |
| 200 | 725 | 0 | This is the anneal cooling segment. |
| 400 | 100 | 0 | This is the final cooling segment. |
As with any kiln schedule, you may need to make adjustments for your kiln. If your kiln is small and your glass is very close to the elements, you may want to consider slowing the ramps in the first and final segments. If your base glass is made of more than one layer of glass you will need to adjust the first and final three segments accordingly.
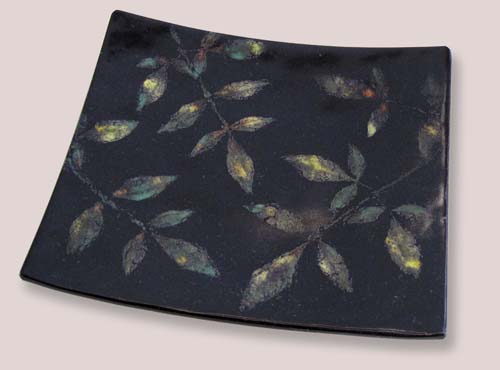
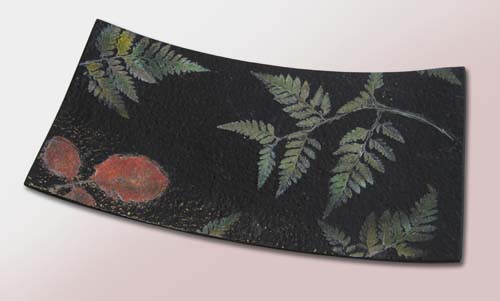
Your Finished Bowl
After your glass has been fired and cooled to room temperature, remove the glass from the kiln and clean off the fiber paper. This may require some scrubbing with a stiff brush and water – but the results should be well worth it. Depending on your kiln and the specific colors you used, the powders may not have fired long or hot enough to have become shiny. If this is the case, you may fire polish the piece, with the powder design up, to get the desired finish.
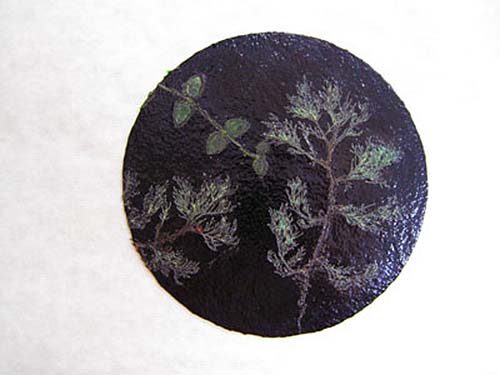
If your leaves had any “woody” parts such as branches then you may notice those features can be seen (and felt) in relief on the surface of your glass. This is the result of the fiber paper binder burning away before the more substantial parts of the plant are gone. The weight of the glass pushes the plant into the fiber paper creating a very shallow mold. This effect can add wonderful dimensionality to your work.
You have a number of choices for finishing the surface of the work. Sandblasting (lightly), fire polishing, and acid etching can all provide different and dramatic looks to the completed work. A simple slump for this piece made for a lovely, one-of-a-kind bowl.